 WE WEREN’T REALLY SURE HOW MANY WOULD SHOW UP, but between Nancy Lund (and members of the Benicia Bicycle Club), Fred Ayala (Benicia police), Greg Andrada (Wheels in Motion), Doug Snyder (California e-Bikes) and Sharon Maher, Bruce Barrow and myself (Community Sustainability Commission) — and oh yes, additional representation from the Benicia High School competitive Mountain Bike Club — we knew we’d be ready for whomever did show for the bicycle clinic this past weekend.
It was a perfect Saturday morning for the clinic, with beautiful blue skies and a cooling breeze. We originally estimated 15 to 30 bicyclists would come. We were delightfully surprised to get more than 50 participants.
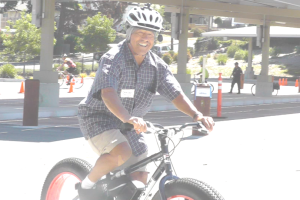
I would say there was just about every representation of bicycles and bicyclists at the clinic. Naturally, there was a terrific representation of Benicia Bicycle Club members and other serious riders with feather-light and very high-tech bicycles. Freestyle bikes were in abundance, along with the sturdy and very functional road bicycles. Doug Snyder brought three electric bicycles and one electric recumbent, and Bruce Barrow and I each rode our electric bicycles to the clinic.
Mayor Elizabeth Patterson was put to work doing a final bike inspection after bicycles had moved through a series of maintenance and repair stations on the deck outside the Community Center. With the “good to go” from our mayor, cyclists proceeded down to the parking lot to either demo an electric bicycle with Doug, or to try their cycling skills with Officer Ayala.
Easy for you, difficult for me . . .

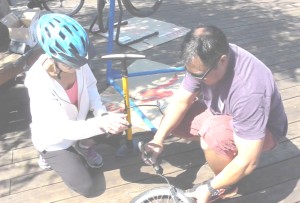
GREG ANDRADA of Wheels in Motion helps a rider inflate her tire at the bicycle clinic Aug. 2. Constance Beutel photos
It took me many tries to do the simple weave through the cones, and after success there, Officer Ayala walked me through the “eliminator” sequence. This was a series of three very tight turns in a cone-marked field. Seeing a fellow cyclist delicately maneuver through the cones, I quickly understood that focus and skill were definitely required.
I can tell you that I made the first turn, several times. Fred told me that at police motorcycle training, if you can’t master this course by the third day of training, you are eliminated from the program. What I know is that I need to practice this skill set. I can see its value as a cyclist, especially when you might get in a situation where you are jammed in by cars or pedestrians and you have to use your head and skills to avoid a crash. Most of the times that I recall where I’ve fallen on my bicycle happened not when I was going fast but when I was moving slowly in an unfamiliar situation.
Tire anxiety
Recently I heard a new phrase: “range anxiety.” It relates to the fear drivers of electric vehicles have that there might not be a charging station before the charge on their car runs out. I think many bicyclists have a similar anxiety — “tire anxiety,” which is dread over being out on a bicycle ride and getting a flat tire.
The first thing to think about is having a spare tube and maybe taking the time to put a little talcum powder on it. The second thing is to carry a working emergency pump and some tire levers.
At the clinic, we had several stations set up to demonstrate on a cyclist’s own bicycle just how to remove the tire from the bicycle, then remove the tire and tube from the bicycle rim. There’s a lot of good information on the Internet as well. Here’s a how-to from REI. (I’m going to assume you already know how to remove the wheel from the bicycle after you’ve released the brakes.)
“Most bike tires are held inside the rims with a combination of physical grip and air pressure. The grip comes from the edge — or ‘bead’ — of the tire interlocking with the edge of the rim. The pressure comes from the inflated tube pressing the tire against the rim.
“First, release all of the remaining air from your flat tire by depressing the small plunger in the center of your tire valve (Presta valves must be opened first. To do so, remove the valve cap and turn the valve counterclockwise.) Next, unseat your tire bead using the following procedure:
“ • Attempt to unseat your tire by hand by pushing one bead edge in toward the center of the rim. If this doesn’t work, use tire levers to get some additional leverage.“ • When using tire levers, start on the section of your tire opposite the valve (to avoid damage to the valve stem). Use the longer end of one tire lever to pry the bead of the tire up and over the edge of the rim.
“ • If you can’t unseat the tire with just one lever, place a second one in a similar manner, 2 or 3 spokes to either side of the first. (Tires levers come with a handy notch that can be secured against a spoke, keeping the lever in place.) Some tire manufacturers suggest sliding the second lever along the rim away from the first to unseat more of the tire. Others suggest using a third tire lever instead to avoid possible tire and/or rim damage.
“ • Once a section of the tire bead is free, you should be able to unseat the rest of the bead with your fingers. Remove the inflatable tube from beneath the tire by pulling the valve stem out through the rim first. The rest of the tube should slide out easily when pulled.
“Be careful when pulling the valve out through the rim, as its sharp edge could damage the valve.”
. . . Putting your tube and tire back on
Here’s REI’s advice on getting the tire back on:
“ • Make sure the rim strip is seated properly.
“ • Partially inflate your new or repaired tube to give it shape and ensure it holds air. Then place the tube inside the tire.
“ • Starting with the valve stem, place the tube and tire onto the wheel.
“ • Reseat one edge (or ‘bead’) of the tire completely.
“ • Beginning close to the valve, reseat the other tire bead inside the rim. Check that the valve stem is straight and not at an angle.
“ • Proceed around the wheel (in both directions at the same time), reseating more of the tire bead. This will get harder as you go.
“ • Pinch both sides of the tire in toward the center of the rim to make things easier, or carefully use a tire lever to complete the job.
“ • Once the tire and valve are in place, check along its edges to make sure that the tube is not caught between the rim and the tire bead. This could cause another flat.
“Now inflate your tire slowly, checking both sides of the rim to make sure that the tire bead stays firmly seated. Double-check the valve as you go to ensure it remains straight.
“To make sure your tube doesn’t get caught between your tire and the rim, go around the whole tire once and pinch both sides of the tire inward.
“Inflate the tire to its recommended pressure (printed on the tire itself or in your owner’s manual). If you don’t have a gauge, use your thumb as a guide. If your thumb presses in easily, keep pumping.”
What I appreciated about Nancy Lund’s demonstration Saturday is that she had several techniques that make the job easier. She reminded us to take the rubber tire casing and to put it on the rim of the wheel, with one edge still outside. She suggested to center any text (brand name, info) over the stem hole on the rim because this can act as a point of reference if needed later as to where there might be some tire (not tube) damage to take care of. She also pointed out that when you’ve inserted the partially inflated tube’s stem into the stem hole, you should seat the tube a little bit on the left of the stem and then a little to the right and keep alternating each side on the tire. Finally, when “snapping” the tire casing back on to the rim, use the same alternating technique.
I know for the few times I’ve had to change a tire, the tire levers are really important. It helps to have some surgical gloves to keep your hands from getting dirty and/or greasy.
Next week I’ll cover some best practices for bicycle maintenance.
Happy riding!
Learn more
• Changing a tire: rei.com/learn/expert-advice/flat-tire.html (There are two helpful videos with the article)
• Electric Bicycle maintenance: blog.newwheel.net/post/30909770356/electric-bike-maintenance-and-service
Constance Beutel is the chair of Benicia’s Community Sustainability Commission. She is a university professor and videographer and holds a doctorate from the University of San Francisco.


Leave a Reply